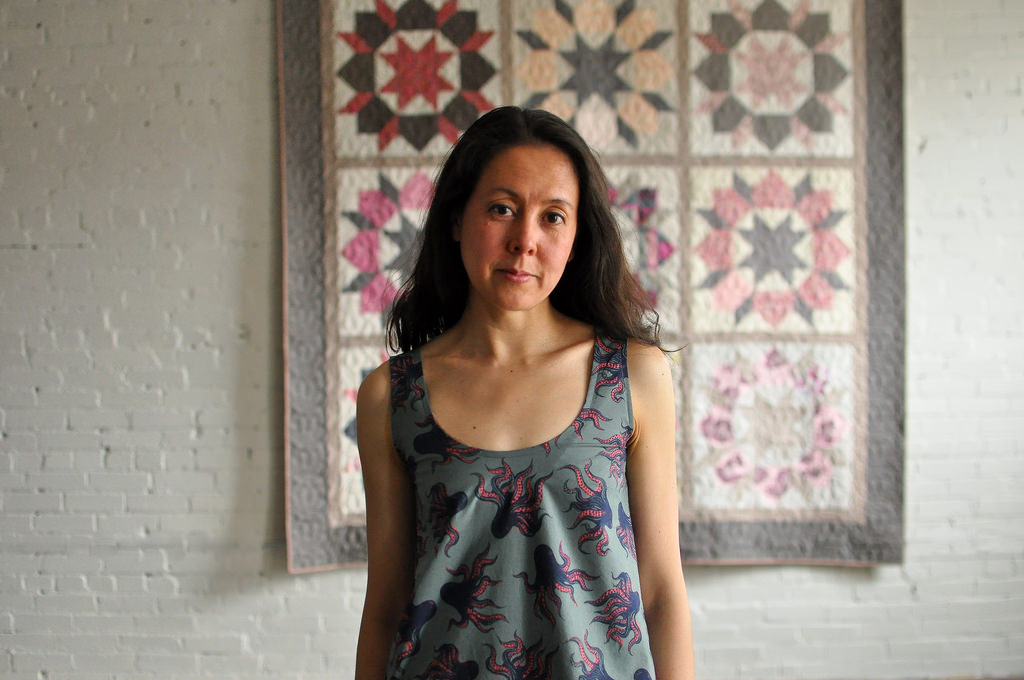
TRAPEZE DRESS : LES FLEURS
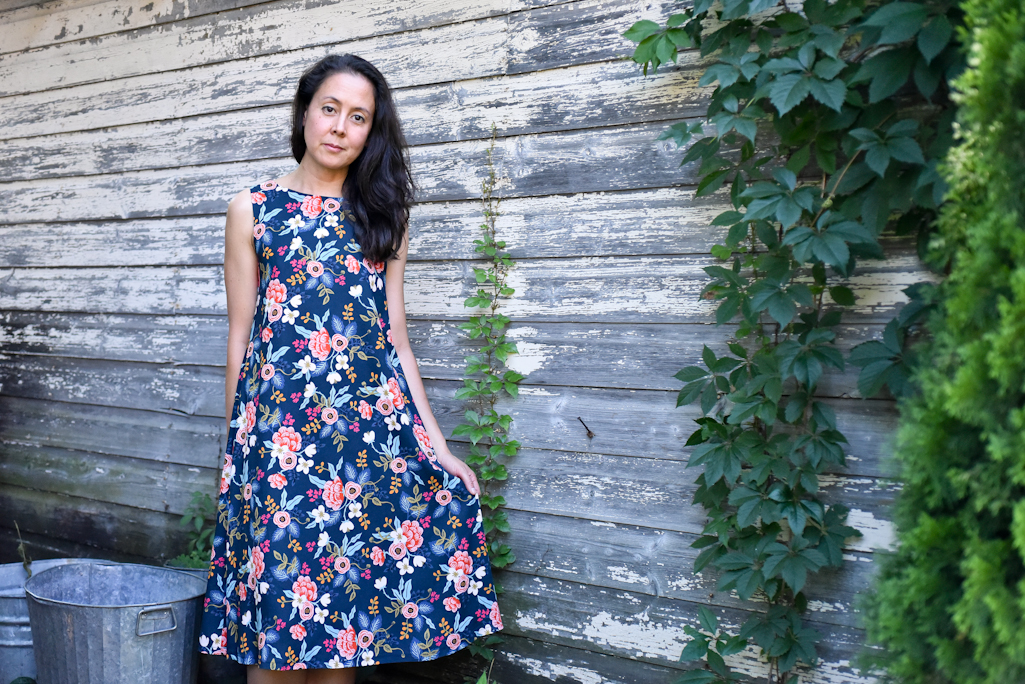
Trapeze Dress pattern by Merchant & Mills
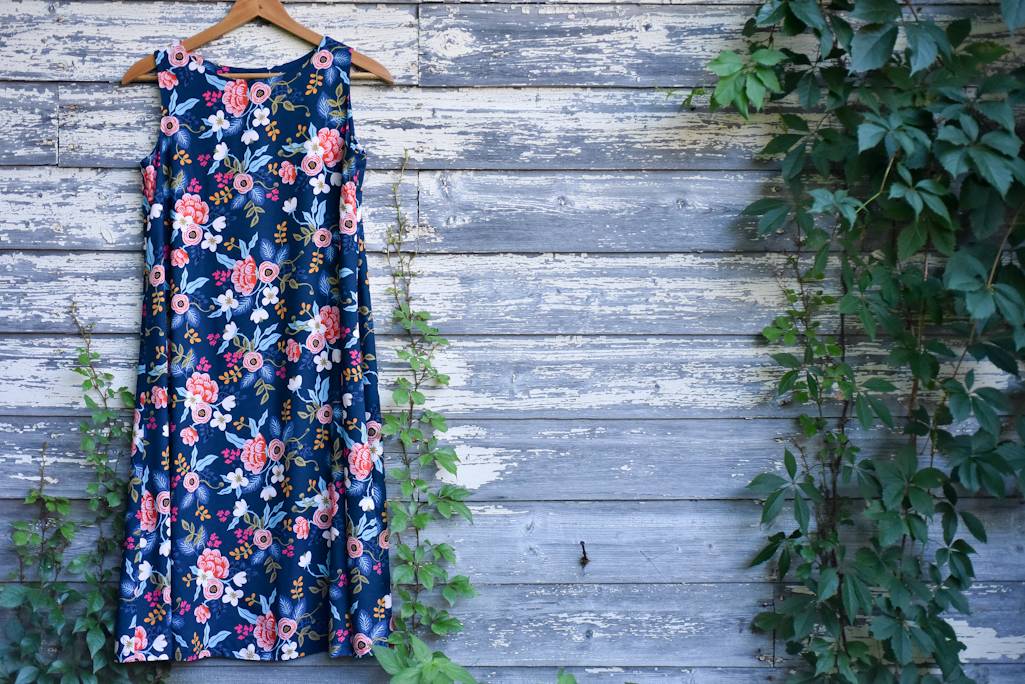
Navy Birch Floral Rayon from the Les Fleurs collection by Rifle Paper Co.
It’s a hot summer. It’s so hot that I am currently lamenting the fact that I don’t have enough sleeveless dresses to wear. I’ve made so many of the Merchant & Mills patterns, but this is my first time making the classic Trapeze Dress. I picked it up a couple weeks ago with the intention of making it in a lightweight chambray.
The Rifle Paper Co. Les Fleurs collection arrived this week and right away, I knew that their floral rayon would pair perfectly with the simple style of the Trapeze Dress. I’ve made a few things with the Cotton & Steel rayon and I don’t usually pre-wash this fabric. They recommend dry cleaning for the longest wearing, but I’ve just been washing in cold and hanging to dry. This has worked well for me so far.
The pattern makes efficient use of your fabric by having the back piece cut in two. You would need twice as much fabric if it was cut on the fold. The pattern also assumes that you are not using a directional print. The front piece and back pieces are cut in opposite directions. Luckily this Floral Birch print was not obviously directional, so I just cut the back pieces ‘upside down’, as directed. If you have something where this would matter, you would want to adjust the yardage to account for that. For once, I found that I need exactly the amount of yardage that the pattern recommended. There were only small bits left over once I cut out the five pieces.
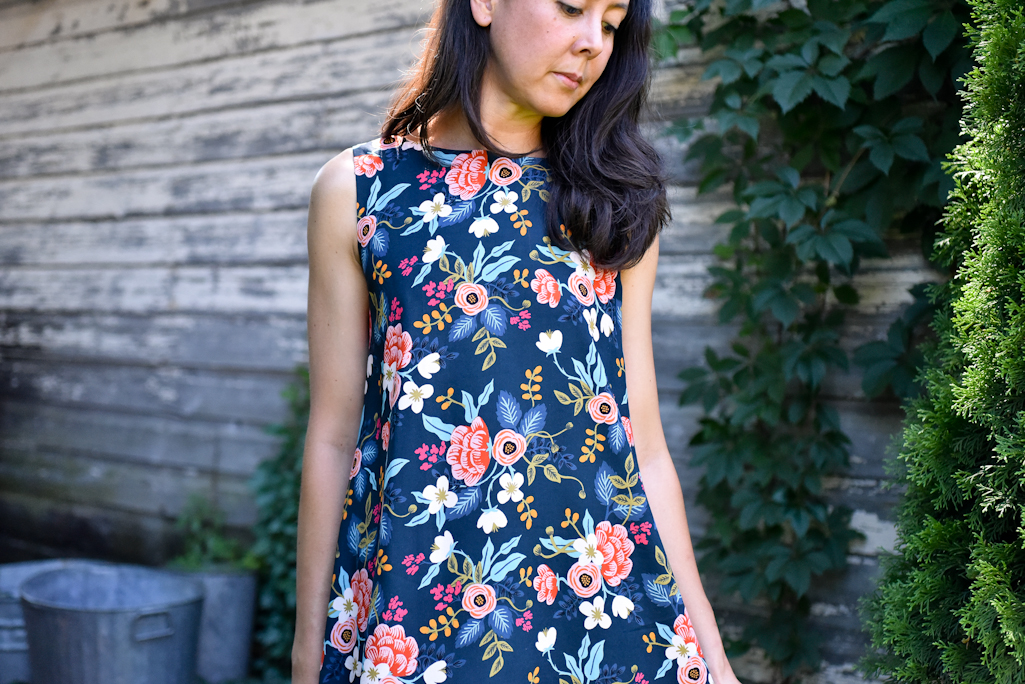
One thing that I was so excited about making this dress is that it is super simple. I figured it would come together quickly with no issues. Of course, there were a couple issues. I knew that I wanted to check the fit. Most of the Merchant & Mills patterns are a bit more of a relaxed fit than I like. I often will take in the sides a little bit, especially around the waist just to give a bit more definition there. That’s exactly what I ended up doing here. I just took a bit off the sides, adjusted my pattern and then matched my changes to the front and back facing pieces.
This pattern uses a proper facing rather than just bias finishing. Hooray! I love facings. Not only that, it’s an all-in-one facing, meaning it faces the neck and the sleeves at once. I’ve done this before and have used a method that leave the shoulder seams open. I was interested in trying their method. I tried to walk through it carefully a few times and always got stuck with everything being all twisted up. There was a lot of stitch ripping and cursing as I tried to make sense of the steps. Hoping the internet would have the answer, I looked it up and found a few people mentioning having difficulty, as well. Some people gave up and did bias trim and others figured it out but didn’t offer any insights. When I checked YouTube for a tutorial, I found a few, but none following the same method as the Merchant & Mills instructions. This tutorial from Threads seemed really straightforward and worked perfectly for me. I did have to back track a bit to undo the side seams of the dress and the facings but it was worth it to learn this great technique. Also, the pattern calls for interfacing the facings, which I skipped and I’m happy that I did. This rayon is heavy enough to hold it’s own. To tack down the facing under the arms, I just stitched in the ditch of the side seam (through the dress & the facing) for a few inches to hold the facing in place. Facings that flip around are incredibly annoying.
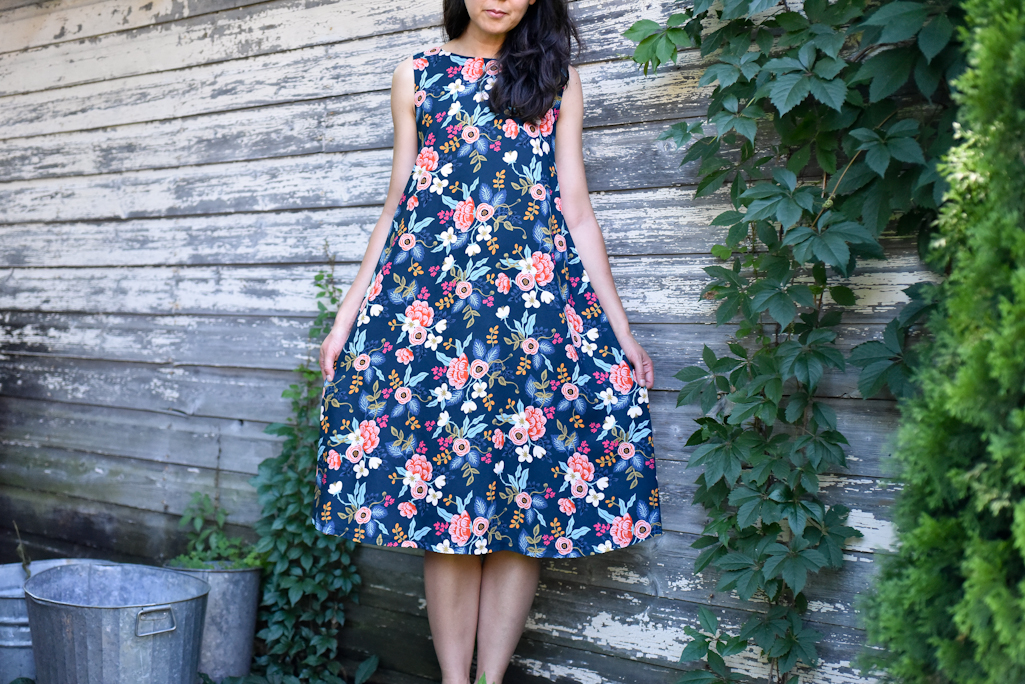
I kept the length of the dress as it is in the pattern. It’s pretty dressy and I’m planning on wearing it to a wedding in a couple weeks. Normally, I would add side seam pockets but I wanted to keep the drape and lines of the swishy silhouette without the pockets (and my iPhone) dragging the side seam down.
This first version took me a bit longer to make than I anticipated, but now that it’s all sorted. I know I will be able to knock out my next ones in just a couple hours. This is truly the perfect dress for the summer!
SEWING NOTES
Size: 8
Adjustments: took the sides in slightly for a better bit
Yardage: Pattern calls for 1.9 metres of 44 inch wide fabric and it was a tight squeeze. You would need more fabric if your print is directional. Didn’t use interfacing on the facing pieces.
Construction: Could not figure out their instructions for sewing in the facing. Found a great YouTube tutorial from Threads and followed it instead. It changes the order of assembling the dress though! Added the extra step of tacking down the facing by stitching in the ditch of the underarm seam for a couple inches.


10 comments
Karyn,
I know this sounds crazy, but have you ever thought of posting your garments inside out in order to show us how the garment is constructed?
Liz
Hi Liz! That’s not crazy at all. The process & construction are always worth sharing. I’ll work on documenting that going forward.
I’ve made the sleeveless trapeze twice (once out of a bulky Harris Tweed), and there were many swear words while I struggled with the facings. The link to the new Threads video will make a huge difference in the future. Thank you so much, and kudos on a lovely dress.
It’s a lovely dress. I’m thinking of making one for my daughter. Are there any darts at all?
Hi Dolores. There are no darts in this pattern. I’m not sure how old your daughter is, but they do also make a children’s version of this called the ‘Trapezette’
Thanks, I’ll check out the Trapezette for my granddaughters. My daughter is the mother of my youngest grandson and would like some new office dresses.
What a pretty little dress! I LOVE that print — it’s gorgeous and looks perfect on you. I’m intrigued by your comment “You would need twice as much fabric if it was cut on the fold.” I’m not sure what your layout is, but I’m thinking maybe it’s the typical front piece placed on the fold and back piece is placed next to it along the selvedge edge? If both pieces require a fold, couldn’t you just refold the fabric by opening it up and folding each selvedge edge in to meet the original fold? This gives you two folded edges where you only had one before? That might not work if your skirt flares too much and you were placing the original pieces in opposite directions, but if they were both running in the same direction, it should work?
I just received this pattern in the mail and am planning to make it in a lovely wool-cotton blend for fall and winter. I too feel a bit intimidated by the facing instructions, so thank you for the link to the video! After watching that, I thought that since the dress is seamed up the back anyway, might it be possible to follow the directions for installing facing for a garment with a back zipper from that video, then seam the back of the dress up last instead of first? I guess you’d have to mess around a bit with the back facing pattern piece, and you’d end up with a seam in your facing, but it just looked so much easier than installing it in one piece! I’m planning to make a muslin this weekend, so I’m going to try it out 🙂
Lovely work! I found your post whilst googling myself senseless looking for video tutorials that would help me make sense of the Merchant & Mills trapeze directions. These facings are not for beginners! The pattern is teasingly elliptical when it comes to describing the process of attaching the armhole facings, and I am at my wits’ end. It doesn’t look like anyone has made a step-by-step tutorial specifically for this pattern…I bet your organic traffic would skyrocket if you posted one with lots of photos and explanations! (Please?)
Thanks so much for your comments about the facing – I was at my wits end on this “easy” pattern! Didn’t want to backtrack and take out the side seams, but in the end it was worth it following the Threads you tube video – thanks so much for linking it! Love this pattern I bought to use with Liberty fabric I bought from the famous store on my first ever trip to London (and I’m old!) and happy to have been able to finish this dress with this side trip from Merchant and Mills’ instructions!!!