AMALFI SEAS QUILT : GETTING ORGANIZED
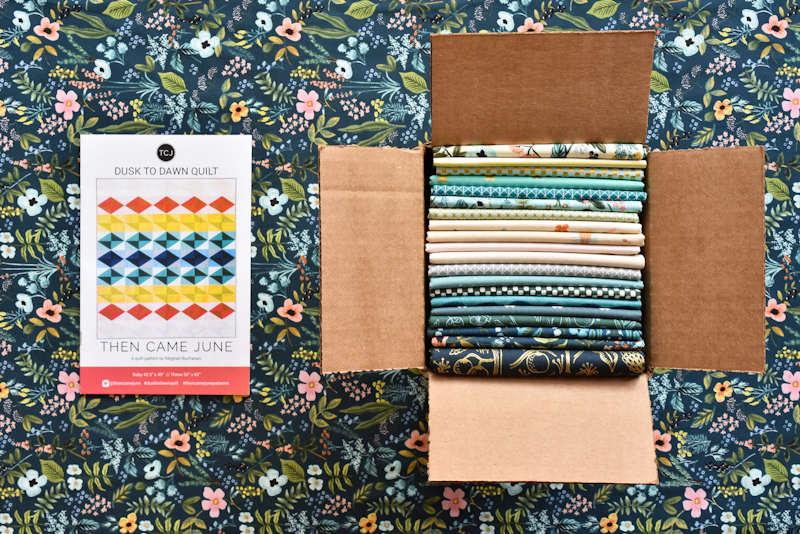
When I saw the Amalfi Seas Quilt at QuiltMarket in Houston, I fell in love with it. It was the perfect use for this gorgeous collection from Rifle Paper Co x Cotton + Steel. I was excited to get my hands on the list to make up quilt kits for the workroom. It’s not too late to get your hands on a kit for yourself too! It comes with all the fabric you need to make the quilt top, along with the binding fabric and the Then Came June pattern called Dusk to Dawn.
I love to make quilts in a class. I really need the dedicated time set aside for these kinds of projects since my default is to make clothing. That said, I’m up for the challenge of doing this quilt on my own and sharing the process with you! I’ll be posting my process to keep myself on track and to share any tips I’ve got, if you’d like to follow along and make your own version of the Dusk to Dawn Quilt using the Amalfi Seas Kit or your own fun selection of fabrics.
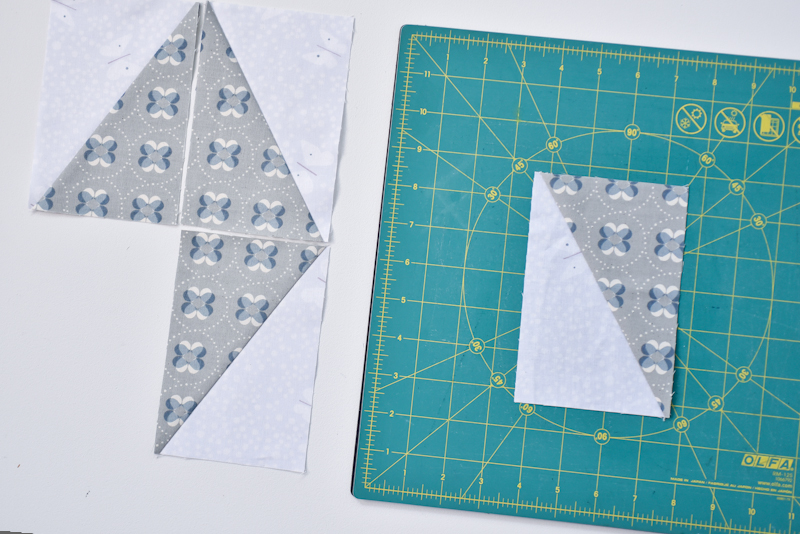
First up, let’s get organized. Before diving in, which is so easy to do when you’re excited about a quilt, it’s best to read through the instructions and do a test block. In all my years of quilting, I haven’t yet tackled doing Half Rectangle Triangles (HRTs) – which is the only block in this quilt. It’s got a reputation for being a bit tricky. I wanted to make sure that I nailed it before cutting everything out.
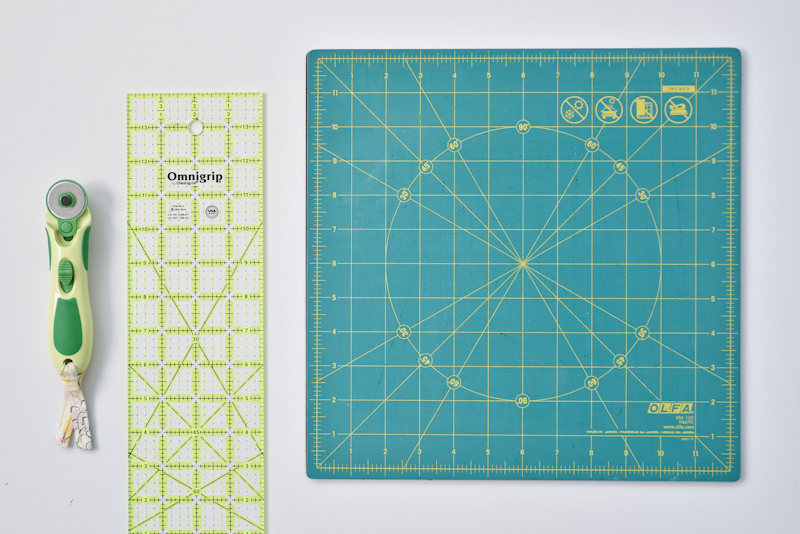
I quickly figured out that a few specific tools would make this process so much easier.
- 28mm rotary cutter – recently this is the size that I reach for the most. It is a bit more nimble and easier to manage, but the more common 45mm will work just as well.
- 4″ wide ruler (this one is 4″ x 14″) – after sewing the HRT block, it trims down to 4″ x 6″. When your ruler is the same width as your final block there is no room for error. The sides trim perfectly and easily each time. I also found it really helpful for trimming out the length too, but we’ll talk all about those details shortly!
- A rotating cutting mat – This is so great for quickly trimming out the block, so that you are only moving the mat and not the block. It is much more efficient, for all the repetitive cutting that needs to be done on these blocks.
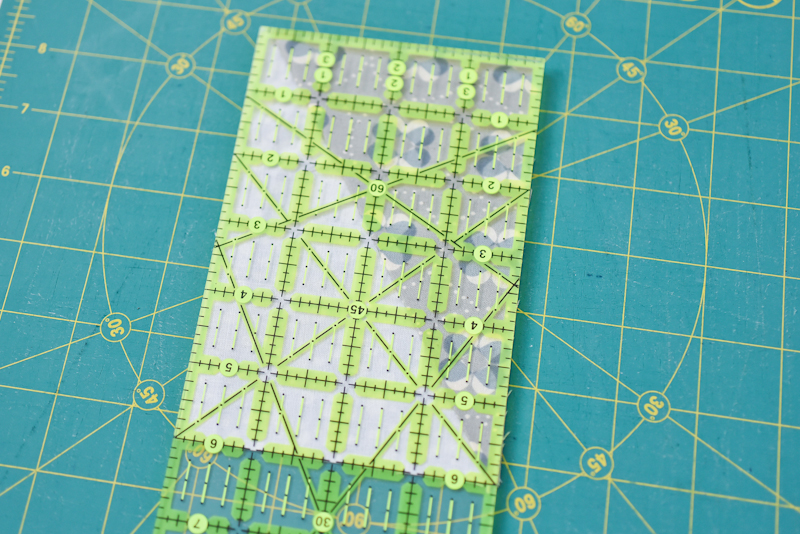

I made my test blocks out of other fabric from my stash. Just in case things went wrong, I didn’t want to have to worry about not having enough. The trimming of the blocks is where the practice comes in handy. After a few blocks I started to feel more confident about getting it right. I’ll show some detail process shots of trimming out the blocks in one of the next posts!
I’ve been using the hashtag #AmalfiSeasQuilt to share my progress. I hope you will too!
Are you planning on making this quilt? Leave a comment to let me know.
Next post is: Cutting!
1 comment
Oh, yay! Finally another quilt from you. Your quilts are the most magical and inspiring to me. I look forward to seeing it.